HOW TO USE A MICROMETER
- Share
- Issue Time
- Sep 22,2022

HOW TO USE A MICROMETER
Many devices can be used to ensure that dimensions are correct, with varying degrees of accuracy. Tape measures, calipers, optical comparators, and many more types of measuring tools can be used to make measurements. One of the most notable and accurate tools for measuring is the micrometer. A micrometer is a powerful tool for checking dimensions, but understanding exactly what a micrometer is, what it can be used for, and how to use it is essential to make accurate measurements.
What is a Micrometer?
A micrometer is a measuring device used to measure flat surfaces or different geometries. For example, the inner diameter or thickness of a pipe. A micrometer consists primarily of a sleeve with a scale, a thimble with a scale, a Vernier scale (or just one digital scale), and two surfaces, known as the anvil and the spindle. The thimble and the spindle are connected to a high precision screw that is used to move the spindle to precise and measurable distances.
Micrometers are finite in the distances that can be used to measure. They are usually broken out into different sizes in 1 inch or 25mm windows (e.g. 1”-2” micrometer, 2”-3” micrometer, 125mm-150mm micrometer, etc.).
The three primary types of micrometers are:
Inside micrometers – used to measure inner dimensions.
Outside micrometers – used to measure outside dimensions.
Depth micrometers – used to measure depth dimensions.
Micrometer with labeled parts
Source
How to Use a Micrometer
Different types of micrometers require very slightly different operating procedures. This section will focus only on an outside metric micrometer.
Make sure that the object being measured is secure either through clamping or some type of fixturing.
With the part held stead, the appropriately sized micrometer can be picked up and loosened with the thimble until the spindle and the anvil can be placed outside of the surfaces on the part that is being measured.
Once this has been accomplished, the thimble can be turned clockwise to begin to move the spindle towards the part. The spindle and the anvil should begin to both press against the part. Excessive forced should not be applied to the thimble here. Too much force can skew measurements to be smaller than the actual dimensions of the part. Many micrometers have a ratchet on the thimble that prevents this from happening.
Once the anvil and the spindle have been placed into simultaneous contact with the part, you are now ready to read the scale of the micrometer.
How to Read the Micrometer Scale
Micrometer scale
There are two main types of micrometer scale systems available: a traditional scale system and a digital scale system. A traditional scale system consists of two to three different scales on the micrometer that, when used together, display to the user of the micrometer the measurement of the part being evaluated. They are known as the sleeve scale, the barrel scale, and the Vernier scale. The Vernier scale may not be present on every micrometer but does offer additional precision (note: operation differs from Vernier Calipers). To illustrate how to read a traditional scale system, see below example (in reference to the image above):
The first part of the measurement is determined by the micrometer type. Assume the micrometer scales in the image below are part of a 100mm to 125mm micrometer. This gives a base measurement of 100mm. As the thimble is turned, the barrel scale moves across the sleeve scale and the Vernier scale.
The sleeve scale in the image above (the bottom left scale) determines the next two digits of the measurement and the first decimal, which comes out to be 05.5mm.
After determining that, the barrel scale is used to obtain additional decimal millimeter measurements (the tenth and the hundredth decimals) that will be added to the 105.5mm already measured on the sleeve scale. Using the barrel scale (the scale on the right), it is found that the first two decimals are 0.28mm.
Currently, the total measurement is 105.78mm, however, the Vernier scale (the top left scale) provides even more precision. The Vernier scale measurement can be determined by finding the line on the Vernier scale that best lines up with any of the lines on the barrel scale. In this case, that number is 3, which translates to 0.003mm.
Summing up the micrometer type (100mm base), the sleeve scale measurement (5.5mm), the barrel scale (0.28mm), and the Vernier scale (0.003mm), gives a total measurement of 105.783mm.
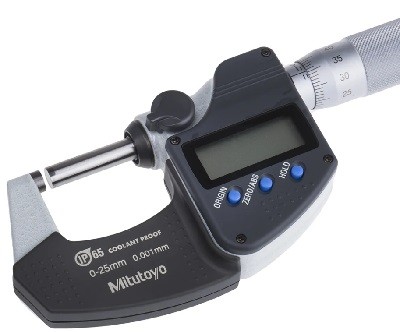
Digital Micrometer
A digital micrometer, on the other hand, is much easier to read. There are still all the same parts, but the major difference is that as the thimble is turned, a digital readout is produced. Digital micrometers provide a great advantage in terms of time savings and reduction in operator error. However, in general they are more expensive.